© 2023 Rachel L. Shumate | All rights reserved.
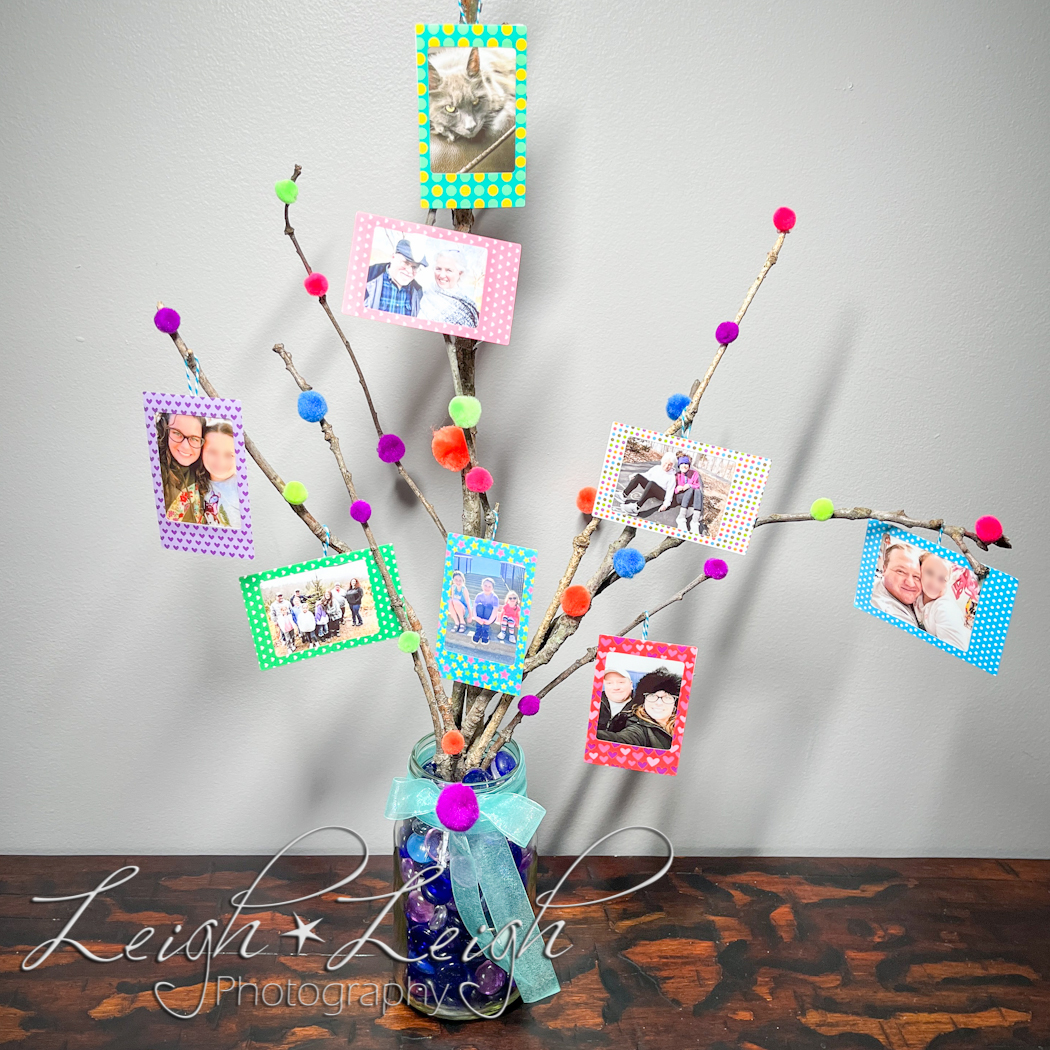
Now this is one of the coolest family trees I’ve ever seen – If I do say so. (Okay, so yes, I’m rather pleased with myself, haha.) In my last post I excitedly told you about my new Fujifilm Instax Mini Link 2 purchase. Well, I decided to get crafty with the fun little polaroids. You simply can’t give me adorable prints (with stickers to decorate them!), and expect me not to go crazy.
Honestly, I can’t wait for Olivia to see my creation (she’s currently at school) because she probably thought I was off my rocker yesterday when I asked her to help me collect sticks, and instead of putting them in the firepit, I brought them inside the house. Actually, I did tell her what I had in mind, but in my experience, my family usually thinks I’m totally nuts, as they don’t always share my artistic vision… Or perhaps I suck at explaining things properly. Probably both.
At any rate, this was a total cinch to make, and kinda fun. You don’t have to use polaroid pictures either; small prints, or even tiny works of art would be pretty cool too. And essentially all I did was shove some sticks into a jar and hang pictures on them, but for posterity’s sake, I’ll supply more details below.
Supplies:
- Small prints
- Jar or vase
- Squashed marbles (or some sort of filler)
- Sticks
- String
- Washi tape
- Hot glue
- Scissors
- Decorations (such as stickers, ribbon, pompoms, flowers, thread, etc.)
Directions:
First, fill the jar or vase halfway with your squashed marbles. Then, add your sticks and arrange them as desired. While holding the sticks in your arrangement, fill the jar the rest of the way with the marbles to stabilize and secure the sticks. (The weight of the glass marbles will also keep it from tipping over as easily.) Next, take your prints and add any embellishments you like. Then, flip over each print and add a smallish loop of string by attaching it to the back with a piece of washi tape. Once your “ornaments” are ready, decorate your “tree.” Lastly, as a finishing touch, add any desired decorations to the branches, such as flowers or pompoms, using a hot glue gun, and tie a bow on the jar or vase. And voilà! Now you have a fun and meaningful decoration.
Happy crafting!
PS: I decided to make this for Olivia because I knew she’d love it. And the cat, Maya, isn’t allowed in Olivia’s room (she likes to attack Olivia’s beloved stuffed animals every chance she gets). Maya is a bit of a she-devil. I’m hoping it’s just kitty teenage angst, or something, that will eventually pass, haha. Truly though, this tree would be decimated in a matter of minutes anywhere else in the house. However, if I didn’t have a hellcat, I think this project would be amazing on a larger, more elaborate scale – and maybe in a more elegant fashion. It would look awesome with colorful or silver thread wrapped around the sticks, or fairy lights, or both!!! And maybe use silk flowers instead of pompoms… (Sigh… stupid cat.)
🙂