© 2024 Rachel L. Shumate | All rights reserved.
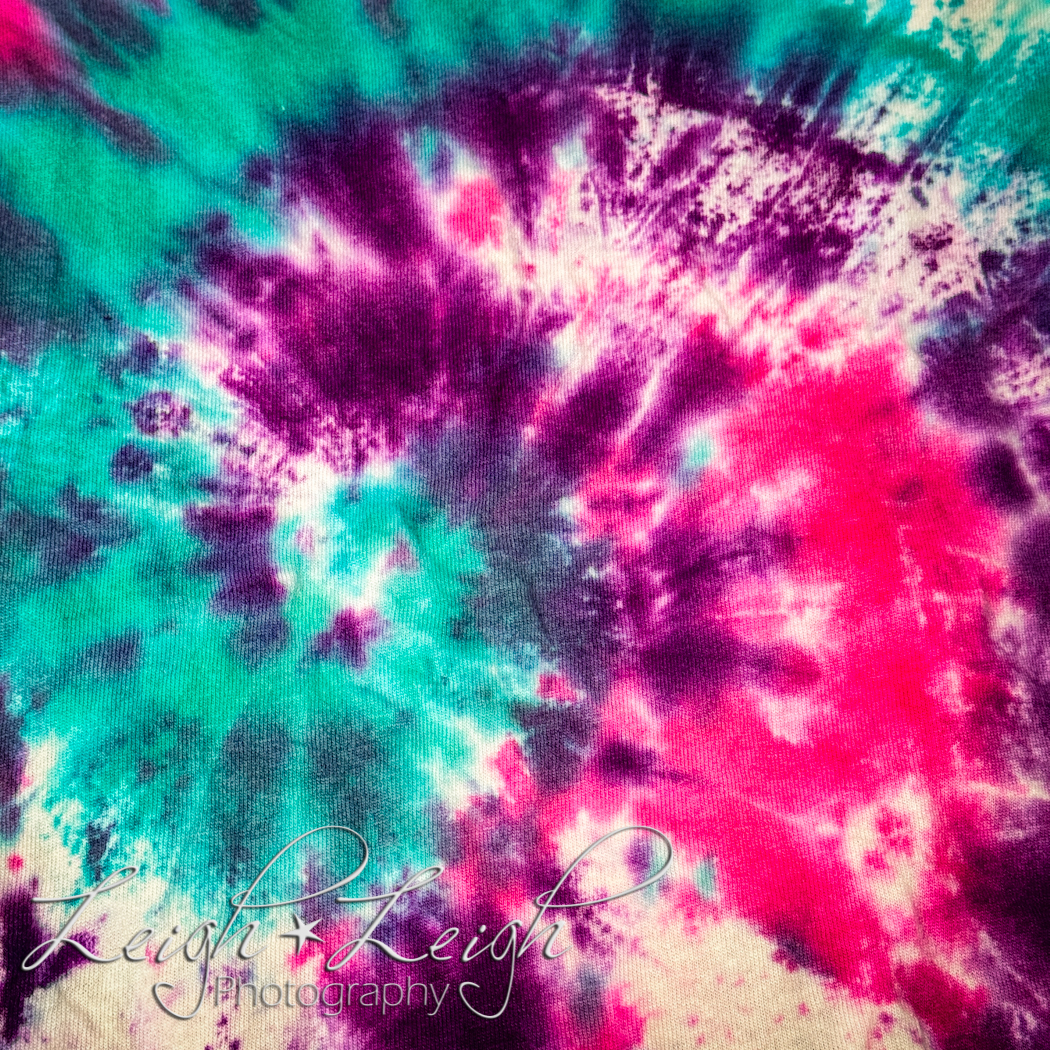
This activity is practically guaranteed to be loved by all participants – adults and kids alike! In fact, tie-dying has inadvertently become a summer tradition for us because we have such a blast. (Though honestly, it’s great to do any time the weather is nice.) And once you try it, you’ll likely want to tie-dye your entire closet. It’s that fun – and a little addictive…
Oddly enough, even though we are not new to the tie-dying process, we somehow always struggle to remember how to go about it, and I always end up with dye on my hands for a few days. (It’s ridiculous; you’d think I’d learn.) So, this post is as much for me as it is you. Maybe next time, I’ll refer back to my own words and perhaps I’ll remember that we’re supposed to wash the shirts before we start.
If you’d like to give it a try, I promise it’s not hard, everything always ends up looking awesome (even when you have your doubts), and you’ll have a great time making memories and colorful shirts.
What you’ll need:
- A 100% cotton t-shirt (or other cotton items are fun too)
- A tie-dye kit from Walmart (we like to keep things simple) in whatever colors you prefer
- Rubber bands
- Plastic shopping bags
- Rubber gloves (seriously, wear some gloves, ha)
How to go about it:
First, wash and dry your shirt if it’s new, to remove the sizing. (Don’t use fabric softener or dryer sheets.) Once your shirt is ready, I suggest an outside workspace and donning old clothes, as the dye is quite permanent… Then, pick a design, or go rogue and do your own, and apply rubber bands to your shirt accordingly. (When you buy the kits, they usually have various pattern directions and examples.) After you’re happy with your rubber band placements, dunk your shirt in water and then squeeze it out. At this point, I highly recommend putting on some rubber gloves. Next, mix your dye with warm water and follow the instructions that accompany your kit. Then, apply the dye to your shirt however you like (don’t forget the back). Afterwards, place your shirt in a plastic bag, tie it, and let it sit overnight.
Once your shirt has “marinated” in its plastic bag for at least nine hours or so, it’s time to rinse and wash. I recommend putting on more gloves. Then, take out your shirt and rinse it in cold water for a few minutes. After it’s been rinsed for a bit, carefully undo or cut the rubber bands off the shirt, then rinse it a little longer, and toss it in the washing machine. Be sure to wash alone or with other tie-dyed clothing and in cold water. I also recommend using some color grabber sheets every time you wash it so it doesn’t bleed on any of your other clothing.
And there you have it! I bet it turned out amazing and that you want to do it again.
PS: Walmart conveniently has white cotton shirts next to their tie-dye kits in the store.
PPS: If you want to get really creative, you can do a reverse tie-dye on a black t-shirt by spritzing it with bleach first.
🙂