© 2024 Rachel L. Shumate | All rights reserved.
Alright, I’m not gonna lie… When I first found out about this, I got a bit giddy. I’m pretty sure my inner child did a little happy dance. I mean, did you KNOW that they make shrinky dink paper you can print pictures on???
As a photographer, artist, and avid crafter, I couldn’t process the possibilities fast enough. So, I promptly got my hands on some of this magical plastic paper. And then, I started questioning my decision…
As printers go, mine is rather old (as in, more than a decade). And I’m pretty sure in tech-speak it’s officially a dinosaur. I called it such, along with lots of other unsavory names during an hour-long battle that I ultimately lost. After threatening to go Office Space gangster on it (if you get the reference, we’re totally friends), I gave up (because I don’t own a bat) and went to use my friend’s printer for my project instead – which worked perfectly and without a hitch! Go figure, but thank goodness.
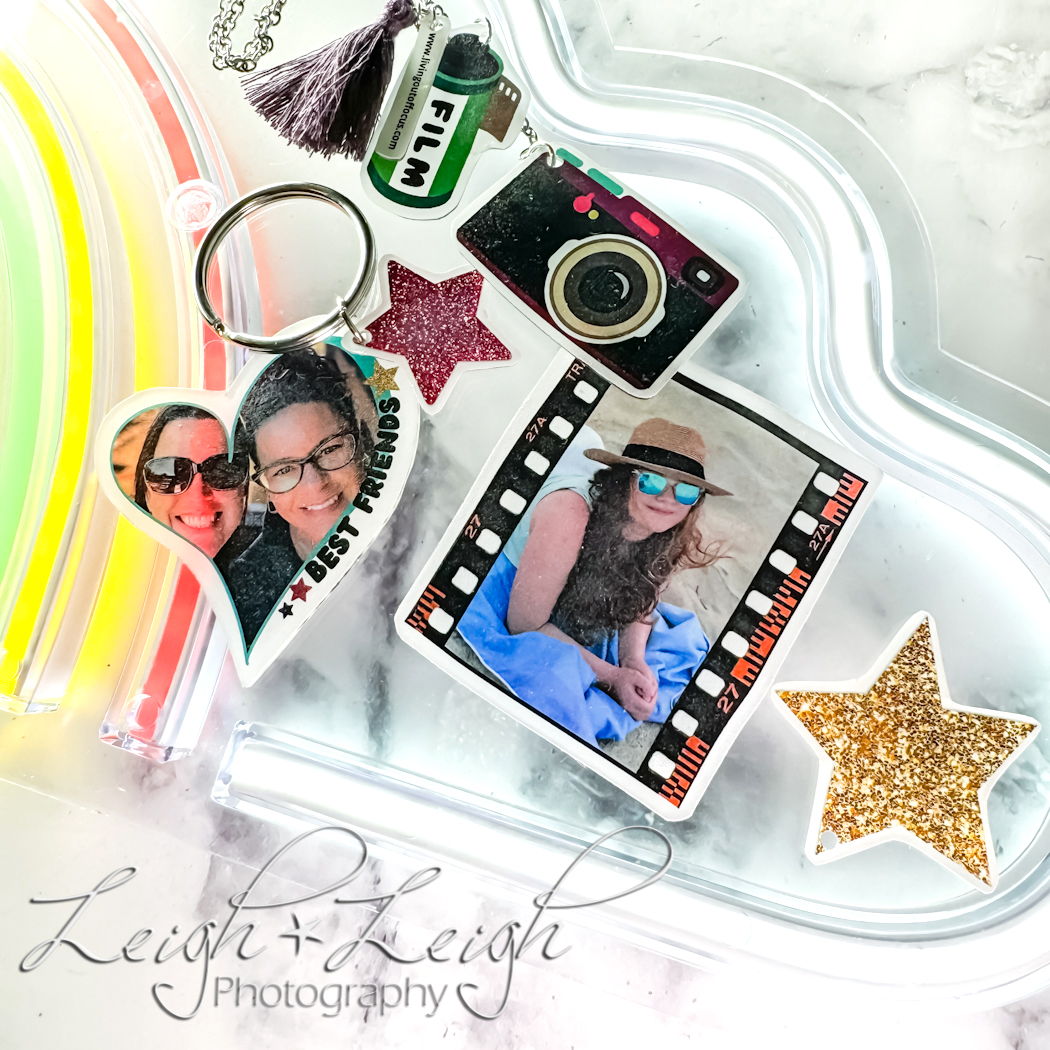
So… Yes; I absolutely recommend this shrinky dink paper. (I just don’t recommend trying it with an ancient printer.) Seriously though, it’s a lot of fun. You can use it to make any number of things: charms, keychains, magnets, sun catchers, ornaments, etc.
Want to try it out with some of your own images? You’re going to love it! Obviously, I recommend you follow the instructions on the package, but I do have a few helpful tips…
- The paper I linked above is an A4 size, so just make sure your printer can accommodate. And again, do this project on a newer printer. (For the record, my printer will print on A4 paper, it apparently was just cranky that day.)
- Test out the shrink ratio sizing. The package I used said it would shrink to 1/5 the size of my image/design, but it actually came out a bit bigger.
- Make sure you leave some space around the edges when cutting out your design.
- When cutting out your images/designs, do so carefully. The “paper” tends to tear easily, particularly in sharp turns with your scissors. Don’t worry too much though because it will likely all melt into place in the end.
- Depending on your intended use, don’t forget to punch a hole in the top for hanging purposes BEFORE you pop them in the oven. (A regular hole punch works great.)
- If your pieces don’t come out of the oven flat, immediately push them down using parchment paper and a spatula or plate. (Just don’t burn yourself.)
- Also, if the above happens and you don’t catch it in time, you can put them back in the oven for a minute or so to reheat and try again.
- And just a note… The designs end up a bit darker after they shrink, but look great when light shines through them. (Hence the makeshift backlighting in the featured image.) So, you might want to edit and lighten up your images just a bit before printing (if that’s a concern).
I hope you have lots of fun with this project! I know I did. If you like the designs I created, simply click here to get my fun and free Canva templates. Just drag and drop your images into the “frames” and feel free to resize and edit as desired.
Happy creating!
🙂