© 2025 Rachel L. Shumate | All rights reserved.
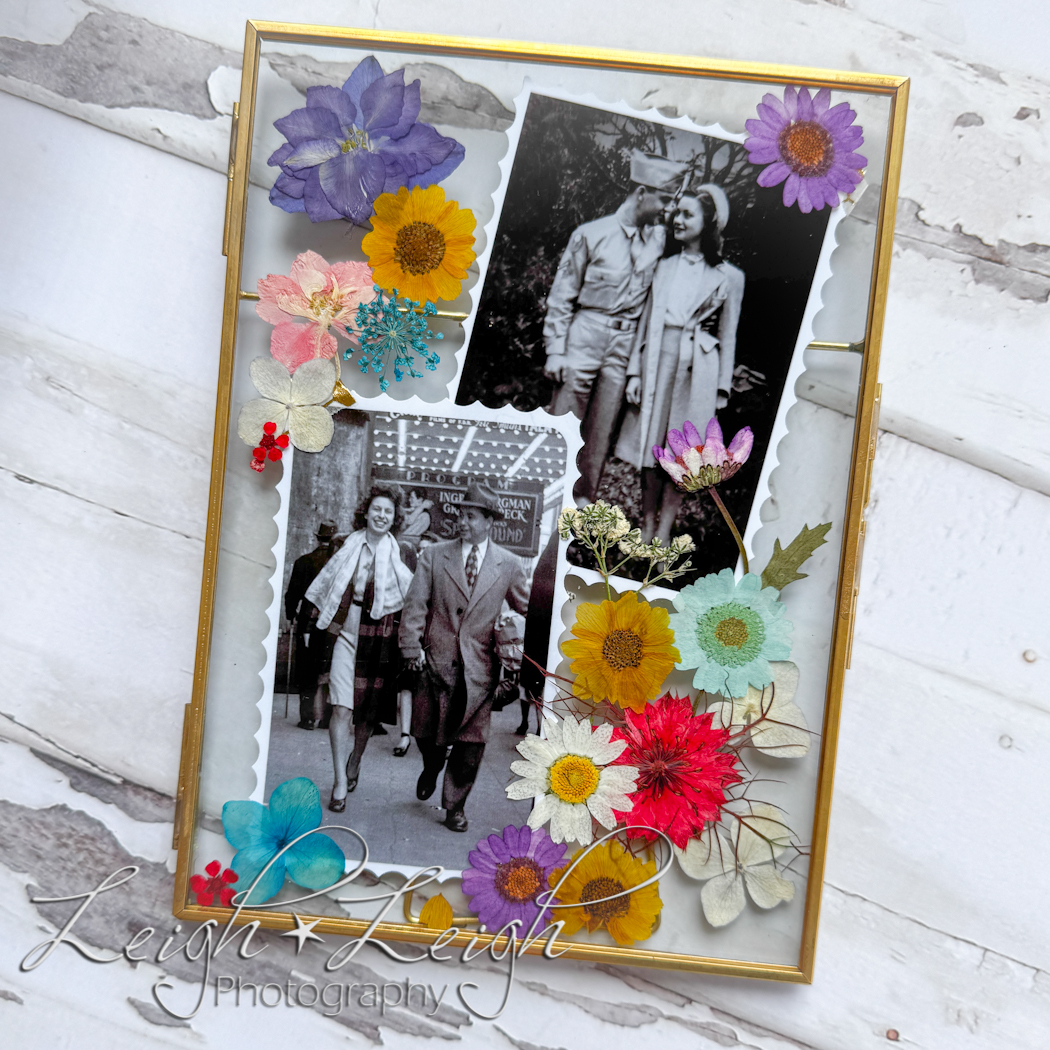
This project is so simple that it’s hardly worth mentioning, but it always turns out so cute that I simply can’t resist. And who doesn’t love an easy project??? Obviously, the concept is a no-brainer. You get a photo or two, some pressed flowers, and put them in a glass frame. I certainly won’t insult your intelligence with a how-to section on this one, but I will share a few tips worth mentioning…
I recommend using a double glass frame that opens like a door with a latch on the side. It’s also important to remember that you want the frame to have ample space around your photo(s) so that you have room to embellish. I used pressed flowers that I purchased, however, you can use your own (as long as they’re quite flat and dried out), particularly if they have a meaning behind them (i.e. from a “mommy bouquet” or a special occasion). I also suggest using washi tape, or even a bit of craft glue, to hold your photos or flowers in place so that they don’t fall to the bottom when you stand the frame up. (Which happened to me the first go-around.) And I can’t stress enough how using tweezers (to move the flowers around) will make your life easier.
Other important things to know… Don’t use original prints for this project; especially if they are old, family heirlooms, or you can’t easily print another. (I scanned my originals and printed the ones you see here.) It’s damaging to prints when they touch glass. So, since this project calls for sandwiching your print between glass and surrounding it with dried flowers, definitely be sure to use a copy of your beloved photograph.
Easy-peasy, right?! I hope you have fun with this one!
PS: I know I’m a bit partial, but aren’t the photos I used fantastic? They are of my grandparents (both sets) when they were young and in love. I think they’re adorable.
PPS: When framing important prints, always make sure to use acid-free mats and backing, as well as UV glass.
🙂