© 2024 Rachel L. Shumate | All rights reserved.
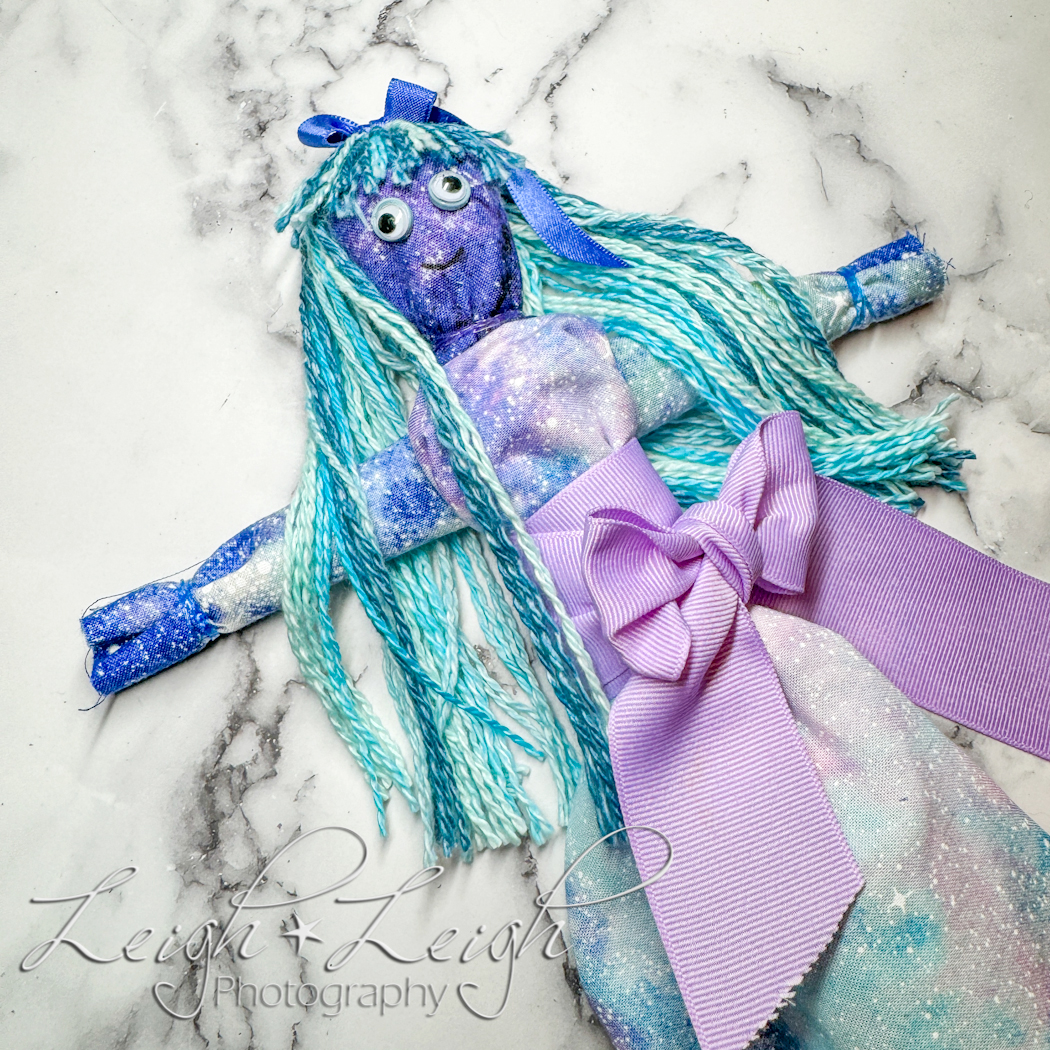
These little rag dolls might not look like much (especially during the process), but this project was such a huge hit with our Girl Scout troop, that I decided to share it on the blog. Believe it or not, we had girls still gushing about it days later. On the other hand, my husband came home when I was at around step six in the making of this doll for the blog post… (See pictures below.) He had all sorts of sarcastic comments, and asked if I was making a voodoo doll. (Admittedly, it didn’t look good.)
All joking aside though, they end up kinda cute and are super easy to make. If you think your kiddo would enjoy this craft and the doll, here’s what you need to know…
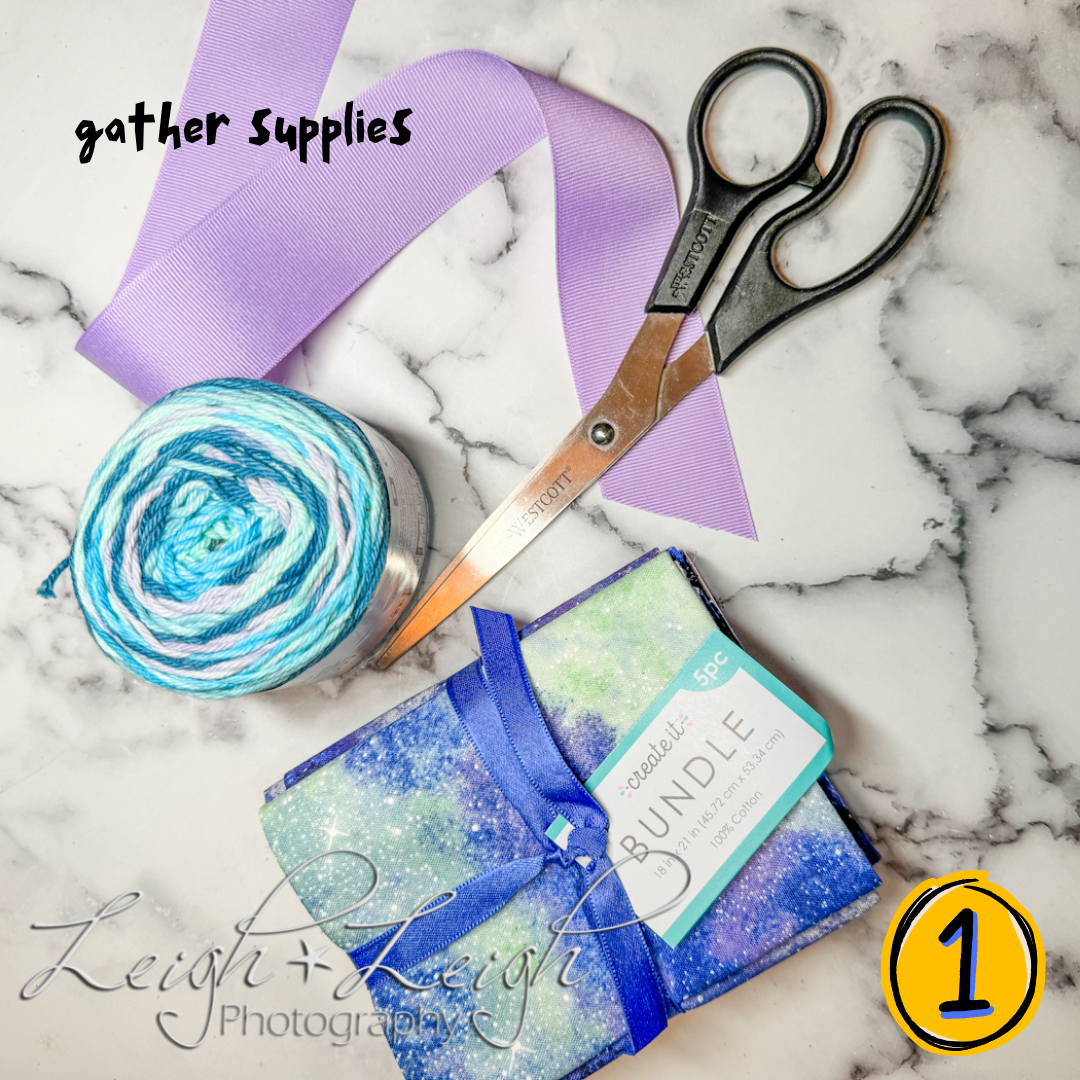
Supplies:
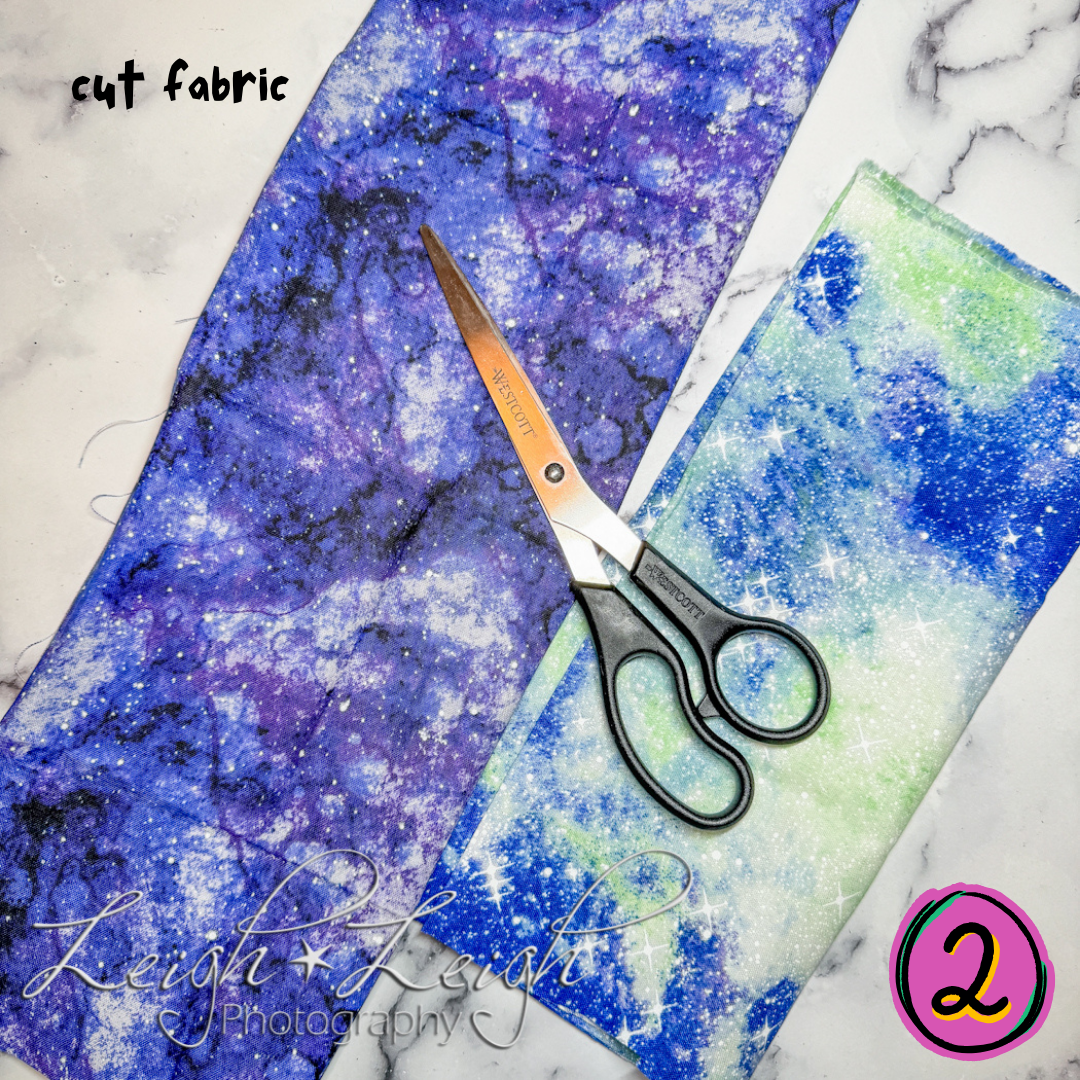
- 3 pieces of fabric (they can be scraps, and you don’t necessarily need any particular measurements)
- Yarn or string
- Ribbon
- 7 little rubber bands (the kind used for small braids, or the ones kids use to make the rubber band bracelets)
- Googly eyes and/or buttons
- Permanent marker
- Scissors
- Hot glue gun
Directions:
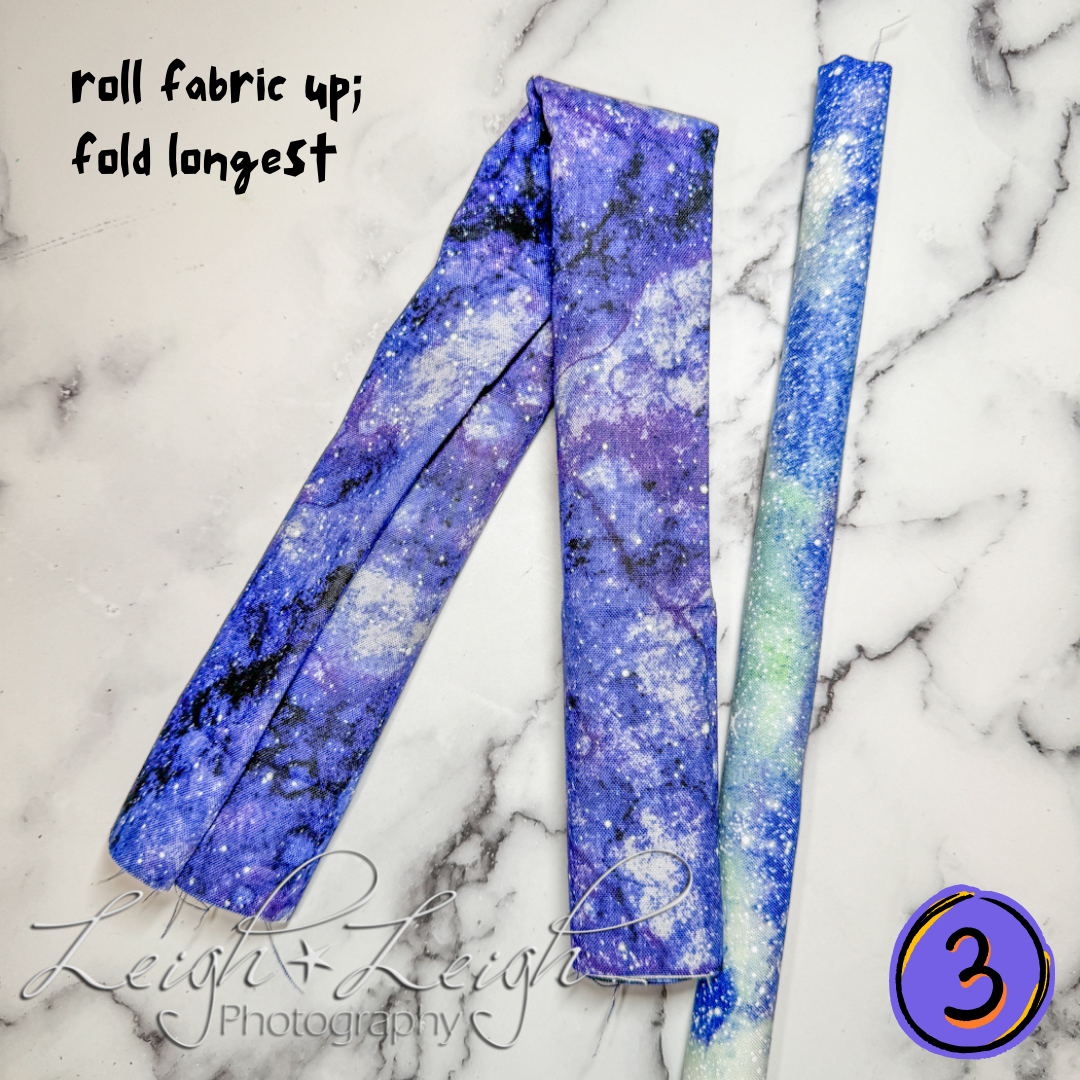
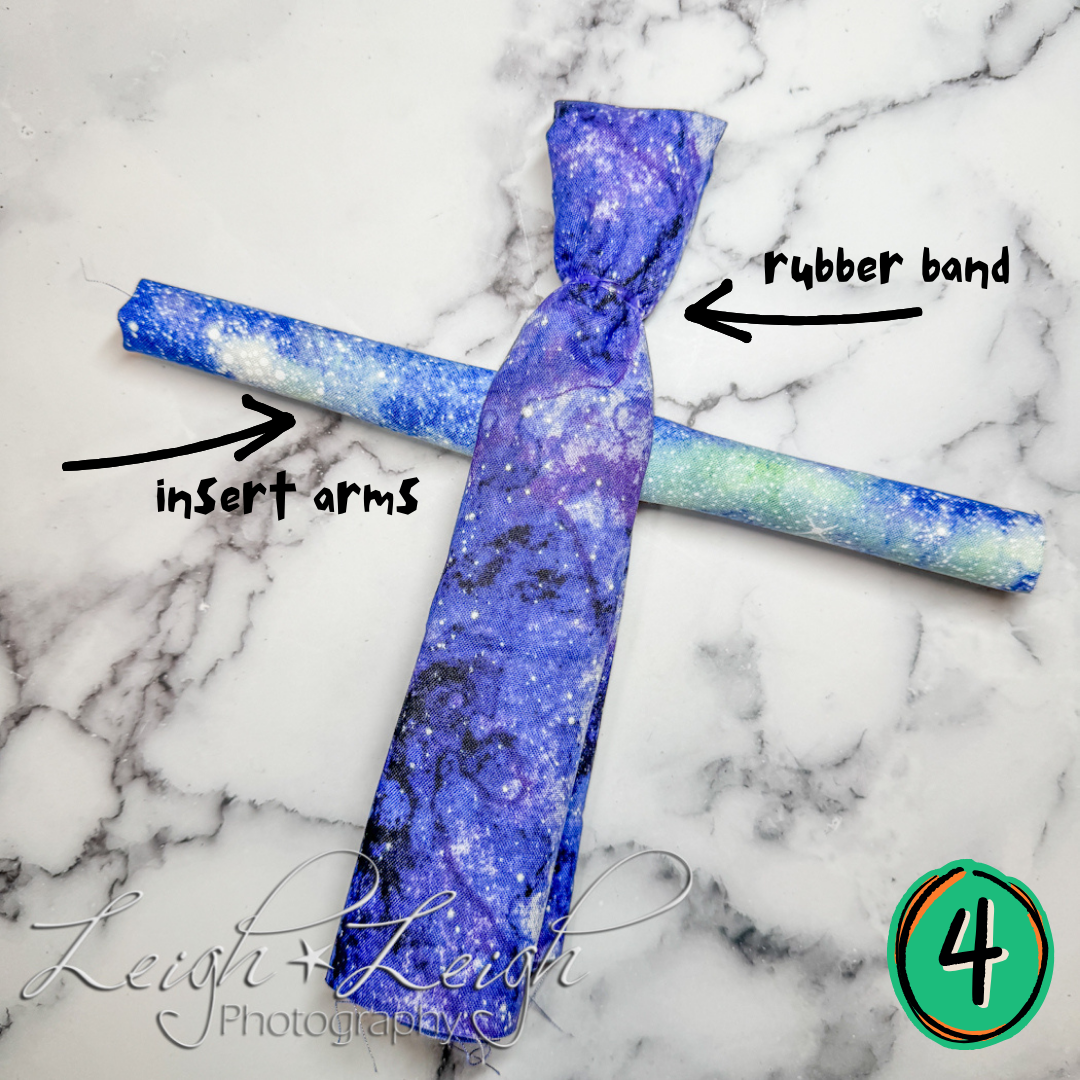
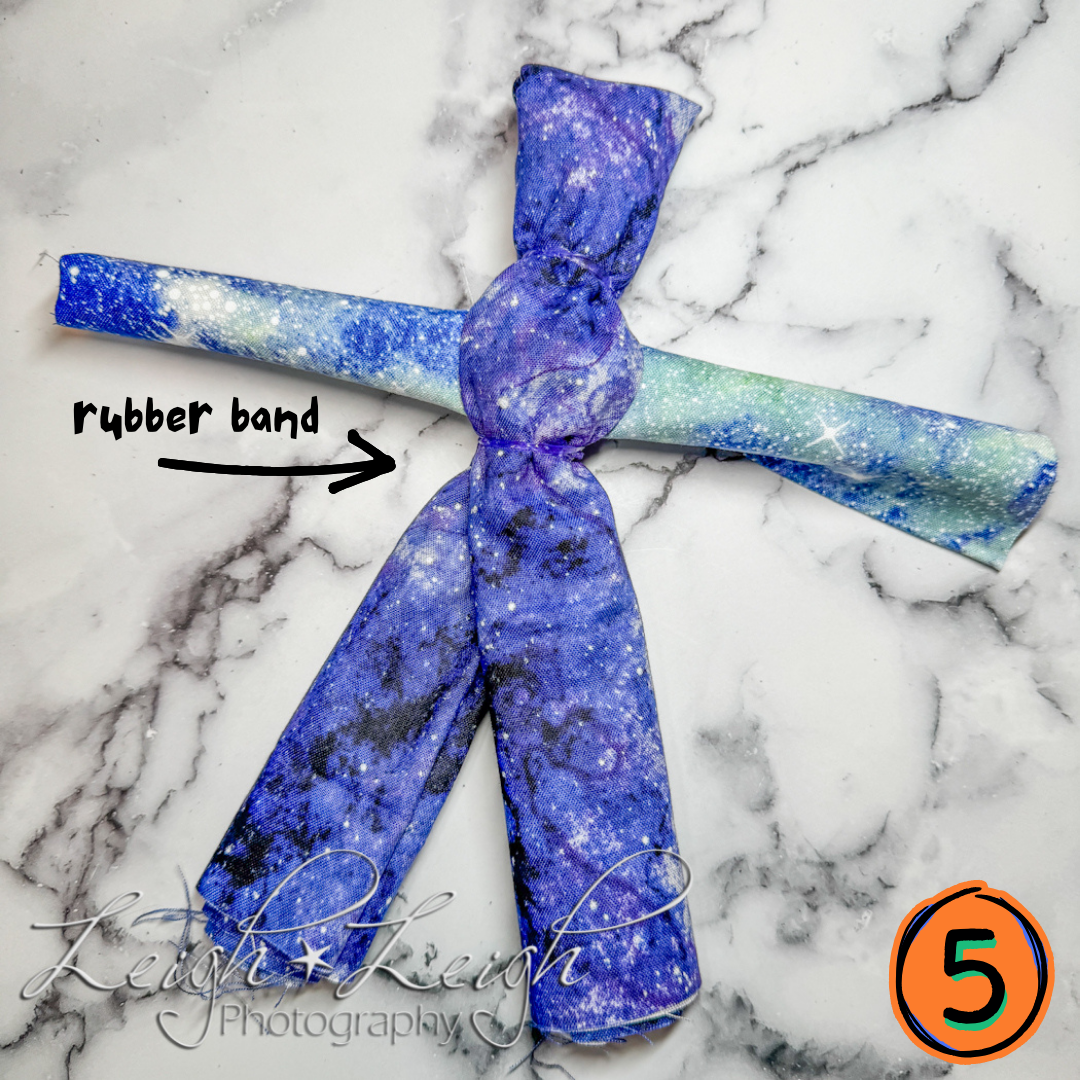
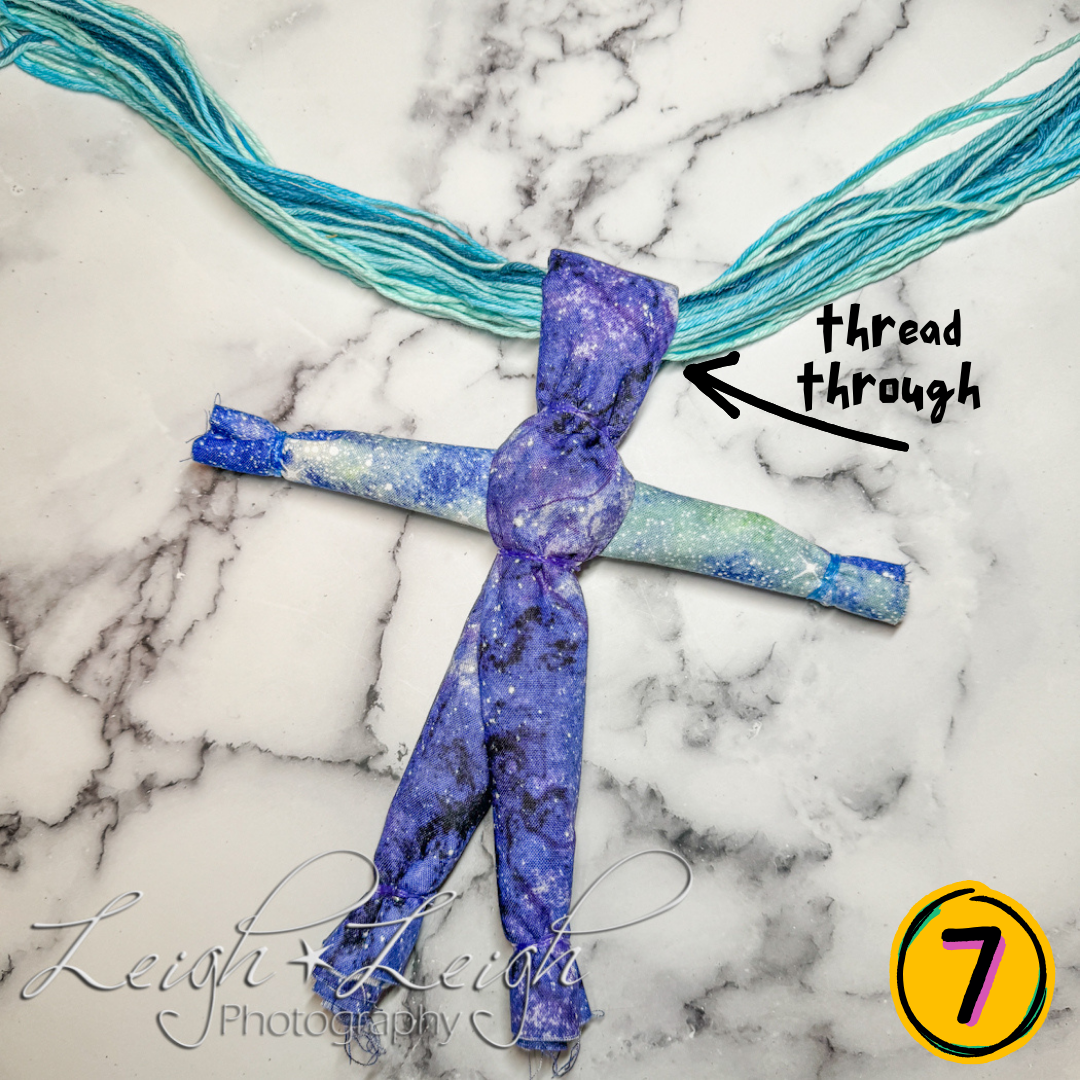
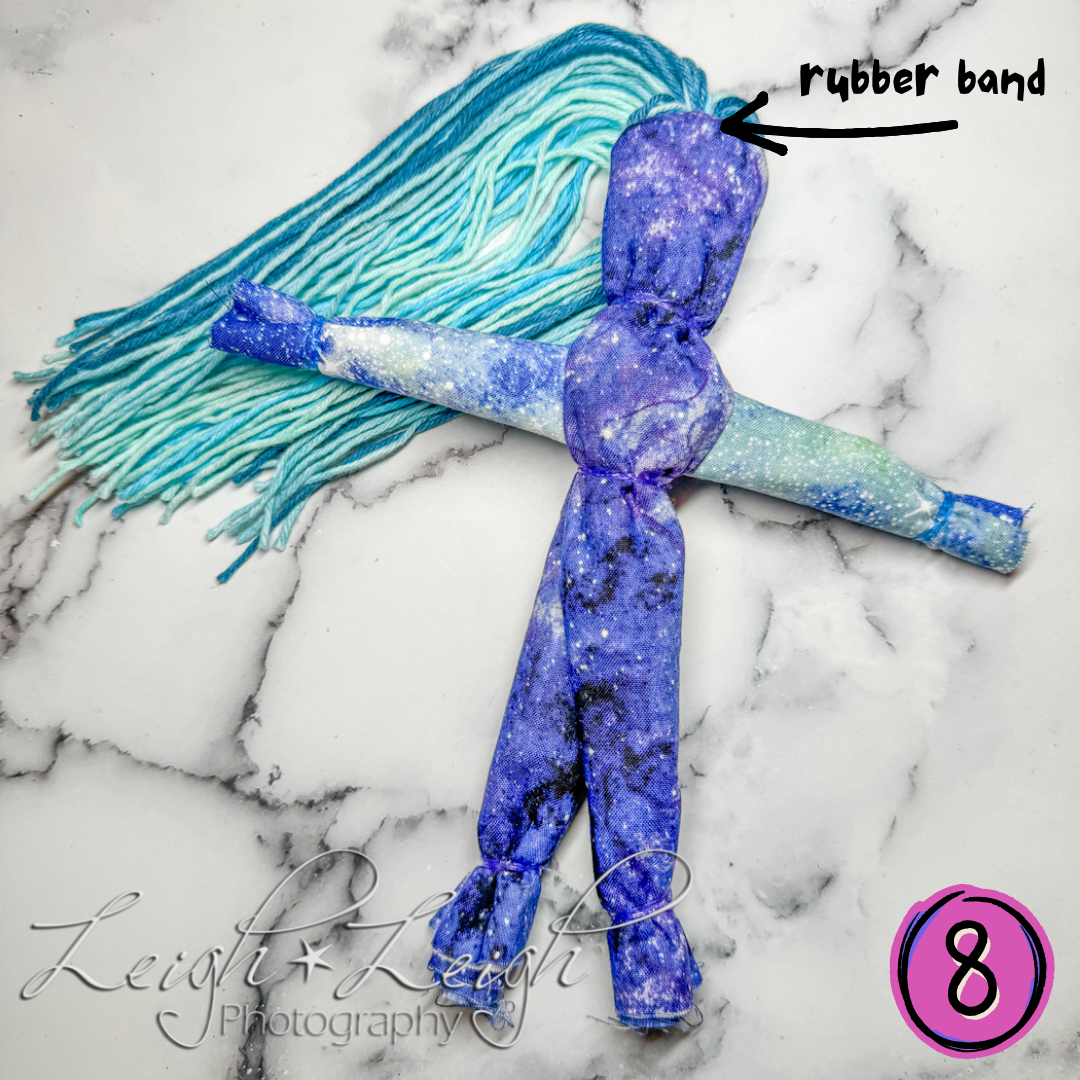
First, take your largest piece of fabric, roll it, and fold it in half. Next, place a rubber band a little way down from the top of the fold to make a head. Then roll another piece of fabric for the arms, and place them between the two pieces of the larger folded fabric. After situating the arms, put another rubber band around the folded fabric for the waist. Next, place rubber bands at the ends of the arms and legs. (You can shorten the limbs if needed.) Then take your yarn and cut several pieces to the desired length you would like the hair to be, and thread them through the space in the top of the head. When you have as much hair as you’d like, put it in a pony tail using the remaining rubber band.
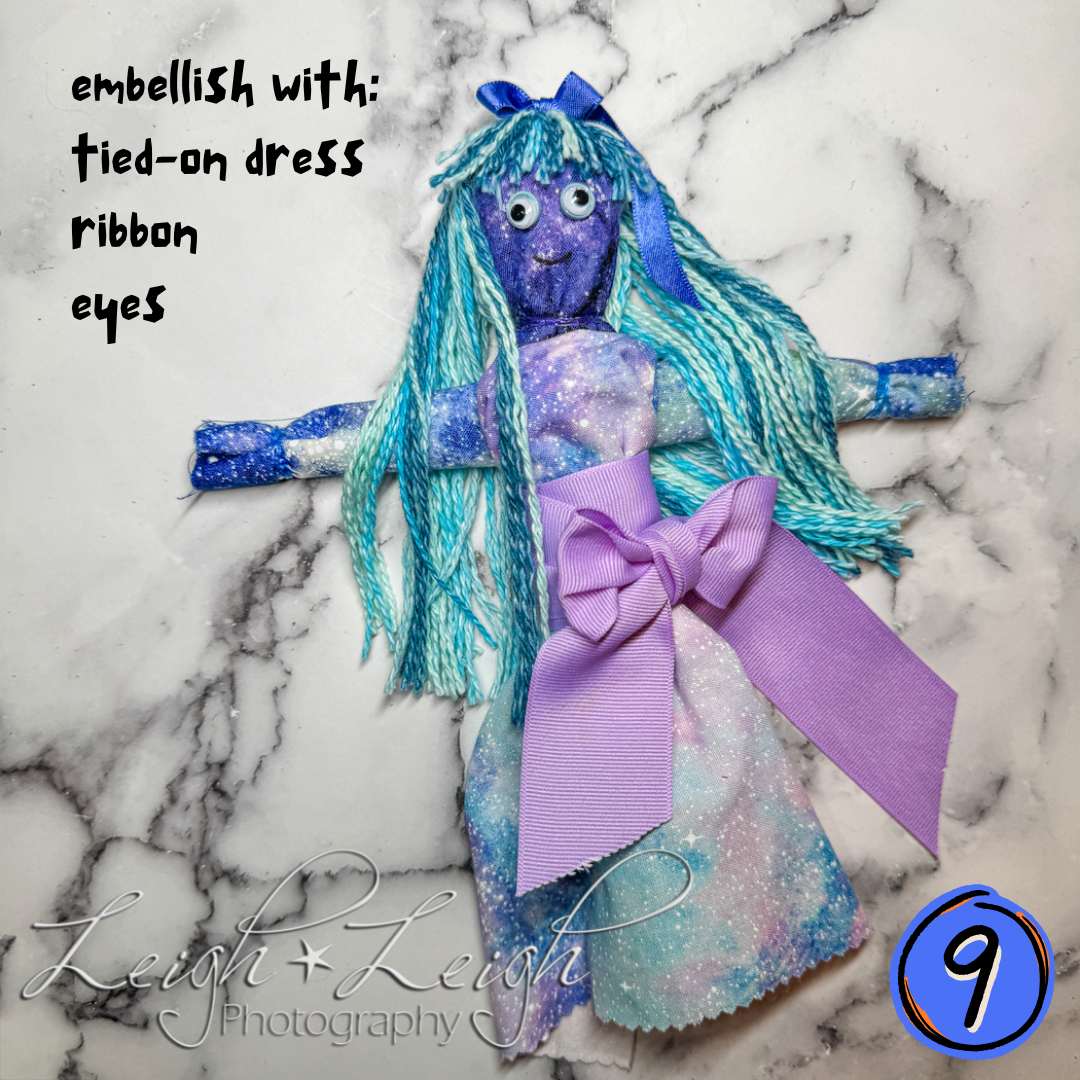
Now you doll is ready to get jazzed up! For my example, I separated the yarn to make her hair cute and kinky, gave her bangs, and a bit of a trim. The process of separating the yarn is kinda tedious, so if your kiddo is pretty young, I might not recommend it. For her dress, I simply wrapped her in the third piece of fabric and tied a bow around her middle. I used buttons, googly eyes, and a permanent marker for her face. And the glue gun came into play when I attached her hair bow and eyes.

I hope you and your kiddo enjoy this cute craft!
🙂