© 2024 Rachel L. Shumate | All rights reserved.
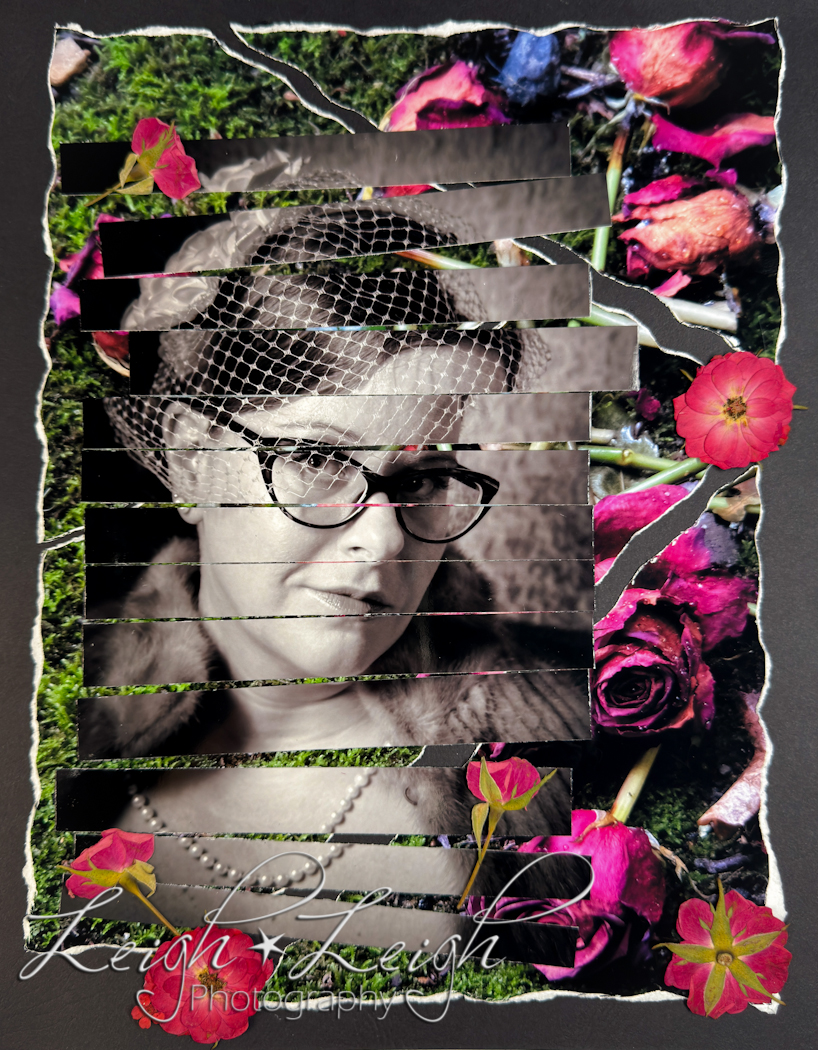
It’s not often you find a photographer who is willing to mutilate a photograph, but in this instance, it’s kinda fun. So, break out your scissors! We’re getting a bit artsy today…
Here are the directions for this Photo Fun project. Step one: cut up a photograph. Step two: glue it together in a funky way. That’s pretty much it, hahaha. Easy-peasy, right?
While the concept is a cinch, you can get really creative with this. I considered doing a landscape image and cutting it into thin strips, then gluing them down extremely staggered. I’ve been wanting to try this with one of my portraits though, and this one seemed perfect. I also love the meaning behind it. In hindsight, I think it might have been better to perhaps cut the strips thinner and distort them more.
You also don’t have to use strips. Obviously, there are zero hard and fast rules here. You can rip your print into pieces, cut it into triangles, or even bits if you like. As you can see, I experimented with this for the background image.
If you’d like some tips before you get started, here are some things I suggest:
- Find a nice piece of paper, or mat board, for your background.
- Use a paper cutter to chop up your image. If you don’t have one, a scissors works fine too, I just have trouble cutting straight lines. Or again, you can simply tear it.
- Craft glue works great for gluing the pieces to your background.
- Paint or embellishments might be fun to add – like the dried roses I placed on top of mine.
- You can seal your finished work with Mod Podge – or resin if you’re feeling “extra.”
- Remember that creativity is all about having a good time, and the experience is more important than the end result.
Hope you have fun with this! Happy chopping…
PS: You might find it amusing to know that Kendall, when looking at the strange project sitting on our counter, told me that it seemed “provocative” and it appeared as though I was looking through blinds all sultry-like. I informed him that I was wearing my grandmother’s attire, and that he just ruined my weird portrait collage for me, haha.
🙂